I absolutely love how the old schoolness of the culinary world is peaking through and we can walk up the street for everything we need. Go visit Oliver!
Thursday, December 22, 2011
New butcher in Dogpatch!
...or not so new, but I finally made my way down there and was greeted with Oliver's cute wife on a busy day a few days before the Holidays. I purchased a beautiful standing pork rib roast a few pounds of delicious grass-fed beef that will be perfect in my enchiladas.


Friday, November 13, 2009
Sunday Supper: Navarro Wine Dinner!

Navarro Vineyard Wine Dinner!
Sunday, 11/22/09, 5pm
Mercedes Hair of the Dog Cantina
653 Commercial St, SF 94111
California Table welcomes Sarah Bennet of Navarro Vineyards for this month's Sunday Supper! So you guessed right~ a wine dinner centered around Navarro's wines. Out of their 18 wines available right now, we're pairing the perfect grapes to this dinner. Local wines, local food, local people. What more can you ask for?
The price of this prix-fixe dinner is $85 which includes 2 beginning appetizers, the 5-course meal, and of course, the wine pairing. A cash bar will also be available for you to purchase wine a la carte and also to buy bottles for the upcoming holidays! Check out the menu below and start blocking off November 22nd to enjoy this evening of gaiety!
Saturday, July 18, 2009
Summer Time in the Bay Area Means Tomatoes!!
I look forward to this time of year all year-round... "when are those Early Girls getting here??" Now people! (well almost) And in celebration, California Table and Melissa Claire (chef extraordinaire and host of the monthly Thursday night dinners at Cafe Velo Rouge) are joining together to give YOU a Tomato Feast~ A prix-fixe menu showcasing heirloom varietals, Early Girls, sweet cherry tomatoes, golds... on and on. All food will be brought in from local farmers, because well, we can do that here in the bay area.
The night will start off with a few tabled apps for you to munch on (um, with tomatoes, of course) and some bubbles to sip. Everyone will then move to the dinner tables to begin their feast. Mostly the food will be family style, so git yer social bug on... while some things we feel deserve their own plates so will be served individually. Cost for this occasion is $55, with wine pairing offered from our wine rep for an additional $30. Sign up on californiatable.net to join us!
Starters Early Girl Gazpacho Shots Oven-Dried Tomato Pesto local sheep cheese, crostinis Family Style Dinner Heirloom Tomatoes purslane, basil, ricotta salata, sea salt BLT fried green tomato, bacon, arugula, tomato aioli Herbed-Ricotta Gnocchi charred cherry tomatoes, chervil Tomato-Braised Beef Roast corn polenta, baby carrots, oven-dried tomatoes Dessert Sundried Tomato Compote over vanilla bean ice cream, wafers

The night will start off with a few tabled apps for you to munch on (um, with tomatoes, of course) and some bubbles to sip. Everyone will then move to the dinner tables to begin their feast. Mostly the food will be family style, so git yer social bug on... while some things we feel deserve their own plates so will be served individually. Cost for this occasion is $55, with wine pairing offered from our wine rep for an additional $30. Sign up on californiatable.net to join us!

Tuesday, April 29, 2008
Paella Party Wrap Up
Hi'ya!
We wanted to thank everyone for coming out to sunny Bernal and helping us make the tapas class and paella party a success. Here are some photos from the day, and thanks Ryan for the great pictures:

We wanted to thank everyone for coming out to sunny Bernal and helping us make the tapas class and paella party a success. Here are some photos from the day, and thanks Ryan for the great pictures:

Sunday, April 6, 2008
Wondering Why Beer and Baguettes are rising in price??
In January I went in to my corner store to buy some beers for a taco party I was having to be shocked that their 6packs had gone up to $10+. I asked the owner, Sam, what was going on and he began to tell me about the price of flour had jumped significantly. He also owns a restaurant in the airport and was explaining how a bag of flour doubled in price from the month befor e. I was fed no details at the time because he was super-busy, so paid for my $12 6 pack, with tax, and went on my merry way.
It took a while to start to see this happen all over. At first I thought this was his way of making more money to keep up with the rent on Noe street until I went to Tartine for a slice of quiche to see they, too, had upped all of their baked goods prices. Bread, the staple food that was so affordable it was called peasant food, is now breaking my piggy bank.
So what is going on?? After doing some research, I sure feel like an ass for selfishly worrying about the well-being of my beer and baked goods. There’s a lot more world out there really suffering from this current problem of the wheat disease that started in Central Africa and is posing a threat to the whole world’s wheat production.
A fungus called Ug99 is the culprit for causing this wheat disease. It has already spread from Africa to Iran and is heading inward toward Pakistan. All of South Asia’s plains rely on Pakistan’s wheat production to feed their dense population. Of course there is current intense research being done to find a cure for Ug99, but right now scientist's main focus is on creating a wheat crop that is resistant to Ug99. MS Money Blog says “The disease, which is said to be a super-strong strain of black stem rust, first came to light in Uganda in 1999 and has since ruined crops in Kenya, Ethiopia and Yemen. Now winds are expected to take the spores to Egypt, Turkey, Syria and Iran. Chinese scientists are said to be on a crash program to develop Ug99-resistant wheat strains before the disease ravages its already weakened croplands.”
Wheat prices have doubled in the past two years but some say it's not because of this current problem, but the problem of energy. The amount of wheat that is found in your brewsky is minimal. A bushel of wheat is $10.50 which makes it $.175 per pound- meaning if beer was pure wheat, there is .13125 dollars worth of wheat in a can of beer.
Regardless, my business partner, Andrew, and I stand firmly behind using our local, organic, and sustainable agriculture. I'm left questioning my ethics in this particular case because scientists are arguing the only way they've currently found to solve/stop this problem of a wheat disease that is posing threat to the whole world's wheat production is to genetically modify wheat. Have you ever tried a gluten-free diet? ;) There are wheat-free beers made from rice available in places like Rainbow and they're not half bad! But let's be real here and take a look at the rest of the world and the absence of Rainbow Groceries. Only we here in the great US, can opt to leave wheat out of our diets and/or to pay the price for the "pure" wheat whereas the rest of the world has no choice.
Something to ponder over as you're scanning over the new price tags, especially being an avid supporter for organic. Are there certain cases that will push our morals aside, allowing us to purchase a genetically altered ingredient or will we die holding on to the last true brew standing behind our organic promise?
 e. I was fed no details at the time because he was super-busy, so paid for my $12 6 pack, with tax, and went on my merry way.
It took a while to start to see this happen all over. At first I thought this was his way of making more money to keep up with the rent on Noe street until I went to Tartine for a slice of quiche to see they, too, had upped all of their baked goods prices. Bread, the staple food that was so affordable it was called peasant food, is now breaking my piggy bank.
So what is going on?? After doing some research, I sure feel like an ass for selfishly worrying about the well-being of my beer and baked goods. There’s a lot more world out there really suffering from this current problem of the wheat disease that started in Central Africa and is posing a threat to the whole world’s wheat production.
A fungus called Ug99 is the culprit for causing this wheat disease. It has already spread from Africa to Iran and is heading inward toward Pakistan. All of South Asia’s plains rely on Pakistan’s wheat production to feed their dense population. Of course there is current intense research being done to find a cure for Ug99, but right now scientist's main focus is on creating a wheat crop that is resistant to Ug99. MS Money Blog says “The disease, which is said to be a super-strong strain of black stem rust, first came to light in Uganda in 1999 and has since ruined crops in Kenya, Ethiopia and Yemen. Now winds are expected to take the spores to Egypt, Turkey, Syria and Iran. Chinese scientists are said to be on a crash program to develop Ug99-resistant wheat strains before the disease ravages its already weakened croplands.”
Wheat prices have doubled in the past two years but some say it's not because of this current problem, but the problem of energy. The amount of wheat that is found in your brewsky is minimal. A bushel of wheat is $10.50 which makes it $.175 per pound- meaning if beer was pure wheat, there is .13125 dollars worth of wheat in a can of beer.
Regardless, my business partner, Andrew, and I stand firmly behind using our local, organic, and sustainable agriculture. I'm left questioning my ethics in this particular case because scientists are arguing the only way they've currently found to solve/stop this problem of a wheat disease that is posing threat to the whole world's wheat production is to genetically modify wheat. Have you ever tried a gluten-free diet? ;) There are wheat-free beers made from rice available in places like Rainbow and they're not half bad! But let's be real here and take a look at the rest of the world and the absence of Rainbow Groceries. Only we here in the great US, can opt to leave wheat out of our diets and/or to pay the price for the "pure" wheat whereas the rest of the world has no choice.
Something to ponder over as you're scanning over the new price tags, especially being an avid supporter for organic. Are there certain cases that will push our morals aside, allowing us to purchase a genetically altered ingredient or will we die holding on to the last true brew standing behind our organic promise?
Friday, March 21, 2008
How'bout a Friday Night with Some Cheese and Wine?

It's time for California Table's monthly extravaganza! We're thinking of a night that's casual, fun, interactive, and free-flowing. And, of course, learning about cheese and wine from the pros. Our friend, Jeff Cohlman, who happens to work at Cowgirl Creamery, will be there talking about the 5 artisanal cheeses we're offering along with our Sommelier and wine maker, Aaron Luna, who will be talking wine talk (this guy is a wine genius!).
The first hour will be time for all of us to move about from cheese station to cheese station while accompanied by our wine glasses. Delicious, seasonal food (that just happens to have wonderful cheese in it, as well) will also be available to practice our new pairing techniques. Now you can pair Braised Shortribs Sugo and pasta with the appropriate wine.
To end the night, everyone will be making and stretching their own mozzarella! Samples from the class, as well as your mozz, will be available to take home with you so you can continue your cheese and wine tour well after you've left.
Tickets are $74. Join us at 6pm and stay until you're ready to go.
Email us at info@californiatable.net for reservations.
Monday, March 10, 2008
It’s Asparagus Time! Try this Shaved Asparagus Salad!
I love this time of year. These sweet, succulent asparagus spears bring joy to me every spring. Did you know Asparagus is a member of the Lily family? They grow as spears an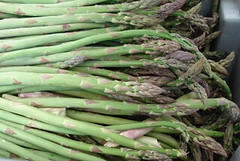 d under ideal conditions can grow 10" in a 24-hour period. Each crown will send spears up for about 6-7 weeks during the spring and early summer. Asparagus is also one of the most nutritionally well-balanced vegetables in existence. Low calories, low sodium, high in vitamins. If you want to see more info about asparagus, check out this.
I can remember back to the days when my grandmother would open a can, plop an unattractive army-green color substance onto a plate and pop it in the microwave. She would serve it up with mayonnaise and a squeeze of lemon. Not exactly gourmet, but poor Nana also didn’t live in Northern California where our produce is far beyond excellence. Try substituting her version with fresh spears steamed or sautéed and accompanied with Meyer lemons and/or a spicy garlic aioli. Now that’s Californian! But I can't help but block the memory from my mind when my mother served asparagus to me when I was not even 3 years old of age. I chewed and chewed and chewed, but no matter what I did, I couldn't get my molars to tear the asparagus into two swallows. I ended up swallowing the first half while the second half was still in my mouth, but attached to the half sliding down my throat by the fibers. Well, this caused a gagging and eye-watering experience, but still I have managed to forgive the brutality once given to asparagus in my upbringing and give it rebirth in the west coast.
There are innumerable ways to prepare asparagus. Steam, poach, fry, sauté, raw, . . . what? Raw?! Yes. In the right season, asparagus can also be enjoyed raw with its natural sweetness and crispy texture. I’m not talking about taking a spear and munching on it like a carrot. That would be odd, and fibrous. Try peeling the asparagus and making shavings for a salad. Check out this simple recipe that follows for a raw asparagus salad:
First you must snap off the butt of the spear to get rid of the inedible woody end. Simply hold the asparagus toward the bottom like you’re going to break a chicken wishbone. Snap the bottom part of the spear off. It will break where is naturally wants to. Discard the ends or you can save them for soup.
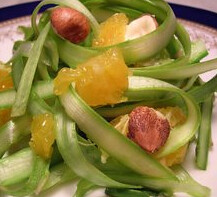
Next, grab your trusty peeler and take a hold of the asparagus spear from where you just made your break. Peel, starting from the bottom, up to and through the top. You will have a beautiful pale green and slightly translucent ribbon of asparagus. Peel/shave the whole spear. Each piece will yield 5-6 shavings, of course depending on the size of the asparagus. (I wouldn’t recommend using “pencil” size asparagus for this application.) Once you’ve shaved 3-4 spears you will be left with a big nest of curly asparagus peelings. Toss the shavings into a bowl along with a squeeze of lemon, a pinch of salt, a crack of black pepper, and a swirl of extra virgin olive oil. Coat all the peelings in this “vinaigrette”, taking the whole pile out of the bowl and onto a salad plate. Shave some Parmesan on top and there you have a wonderful, fresh, and crisp asparagus salad! For a more composed salad, throw some toasted almonds or hazlenuts in with orange segments.
d under ideal conditions can grow 10" in a 24-hour period. Each crown will send spears up for about 6-7 weeks during the spring and early summer. Asparagus is also one of the most nutritionally well-balanced vegetables in existence. Low calories, low sodium, high in vitamins. If you want to see more info about asparagus, check out this.I can remember back to the days when my grandmother would open a can, plop an unattractive army-green color substance onto a plate and pop it in the microwave. She would serve it up with mayonnaise and a squeeze of lemon. Not exactly gourmet, but poor Nana also didn’t live in Northern California where our produce is far beyond excellence. Try substituting her version with fresh spears steamed or sautéed and accompanied with Meyer lemons and/or a spicy garlic aioli. Now that’s Californian! But I can't help but block the memory from my mind when my mother served asparagus to me when I was not even 3 years old of age. I chewed and chewed and chewed, but no matter what I did, I couldn't get my molars to tear the asparagus into two swallows. I ended up swallowing the first half while the second half was still in my mouth, but attached to the half sliding down my throat by the fibers. Well, this caused a gagging and eye-watering experience, but still I have managed to forgive the brutality once given to asparagus in my upbringing and give it rebirth in the west coast.
There are innumerable ways to prepare asparagus. Steam, poach, fry, sauté, raw, . . . what? Raw?! Yes. In the right season, asparagus can also be enjoyed raw with its natural sweetness and crispy texture. I’m not talking about taking a spear and munching on it like a carrot. That would be odd, and fibrous. Try peeling the asparagus and making shavings for a salad. Check out this simple recipe that follows for a raw asparagus salad:
First you must snap off the butt of the spear to get rid of the inedible woody end. Simply hold the asparagus toward the bottom like you’re going to break a chicken wishbone. Snap the bottom part of the spear off. It will break where is naturally wants to. Discard the ends or you can save them for soup.
Next, grab your trusty peeler and take a hold of the asparagus spear from where you just made your break. Peel, starting from the bottom, up to and through the top. You will have a beautiful pale green and slightly translucent ribbon of asparagus. Peel/shave the whole spear. Each piece will yield 5-6 shavings, of course depending on the size of the asparagus. (I wouldn’t recommend using “pencil” size asparagus for this application.) Once you’ve shaved 3-4 spears you will be left with a big nest of curly asparagus peelings. Toss the shavings into a bowl along with a squeeze of lemon, a pinch of salt, a crack of black pepper, and a swirl of extra virgin olive oil. Coat all the peelings in this “vinaigrette”, taking the whole pile out of the bowl and onto a salad plate. Shave some Parmesan on top and there you have a wonderful, fresh, and crisp asparagus salad! For a more composed salad, throw some toasted almonds or hazlenuts in with orange segments.
Sunday, February 17, 2008
And what's next...
Hi everyone!
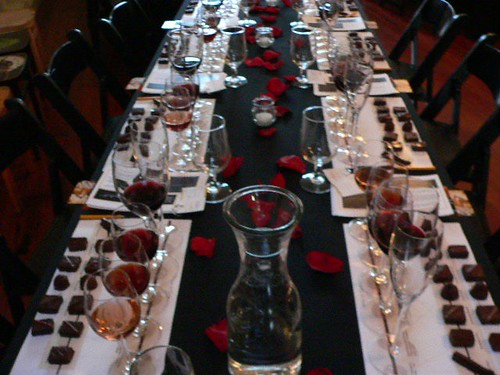
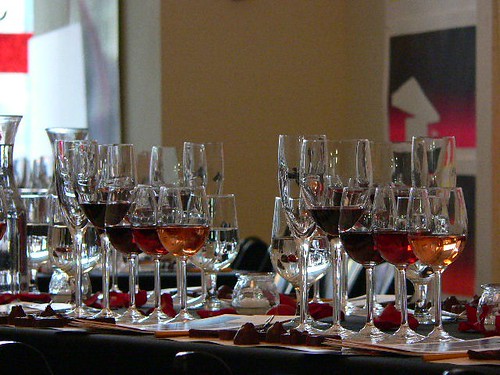
It's been a few weeks since I've last published a post. We were all pretty busy with this past Valentine's Day wine and chocolate pairing. It was a great turn out and we can't wait to hold our next event in March. Stay tuned to what crazy and/or exotic theme we have coming!
Here are a few pictures from Valentine's Day.

It's been a few weeks since I've last published a post. We were all pretty busy with this past Valentine's Day wine and chocolate pairing. It was a great turn out and we can't wait to hold our next event in March. Stay tuned to what crazy and/or exotic theme we have coming!
Here are a few pictures from Valentine's Day.
Monday, January 21, 2008
Valentine's Day Chocolate Soiree!

A Valentine's Day not to miss!! And what else screams Valentine's Day like chocolate?...
Join California Table in our chocolate soiree & wine pairing class with local Chocolatier, Michael Recchiuti!!
The evening will begin in our studio space with good music, small bites, and champagne-sipping until we are ready to sit down and begin "Chocolate 101". Michael Recchiuti will be informing our palates with 7-10 different types and tastes of chocolate confections paired by our wine expert with 5 distinctive varietals and fortified wines trimming down to the perfect match.
The evening will end with q's & a's answered by Michael Recchiuti and of course having the option to purchase your favorite chocolates, spirits, and Recchiuti's Chocolate book, Chocolate Obsession, Confections and Treats to Create and Savor, written with Fran Gage.
Check out part 1 and 2 of Michael's truffle class on youtube here.
Tickets: $85
Email to info@californiatable.net for reservations!
Location:
California Table Studio
3824 Mission Street
San Francisco, CA 94110
cross street: on Mission St. and Richland
district: Bernal Heights
Thursday Feb 14 (6:00pm-8:00pm)
Saturday, January 12, 2008
Starting off the new year with new visions!
Hi my fellow urban dwellers and foodies alike,
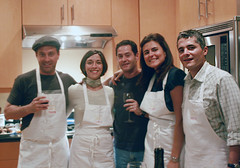
The new year is bringing new promises for upcoming cooking classes and demonstrations. California Table now has a kitchen space available for larger groups. Here are just some of the classes available:
• Cheese Class w/ Wine Option (Wine Expert Brian Havens)
While there are many ways to classify and categorize cheese, different cheeses are, at their core, intimately tied to their places of origin. One of the best ways to survey all of the different types of cheeses and learn about their similarities and differences is by looking to the great cheese making countries and regions of the world as a guidepost. These classes offer an opportunity to taste all the best in artisan cheese – from fresh to aged, cow to sheep to goat, light and grassy to pungent and earthy – covering Cheeses of California foremost, France, Italy, and Cheeses of Spain
• Food/Ingredient of the Month
Northern California explodes with new flavors and super-star ingredients multiple times per season. Join us in these classes to celebrate the changing of the season and the foods that accompany it. We will be utilizing the main ingredietn in 3-4 dishes.
• Sauces and Stocks Class
As any professional chef knows the key to an amazing sauce or dish is in t he stock. You will learn how fast and easy it is to make pristine stocks and how to utilize them in almost any dish.
Sauces are the perfect finishers for any dish- vegetable or protein. Learn some of the classics in this class and how to create beautiful sauces from your homemade stocks.
• Holiday Foods
Everyone needs a helping hand when it comes to entertaining family and loved ones during the holidays. You'll benefit from our tips and techniques for creating an unforgettable feast. Discover timeless recipes and a practical approach to cooking while you prepare and sample traditional holiday flavors and fresh contemporary twists on old favorites.
• For our corporate clients, we offer 'Corporate Team Building' cooking classes and competitions:
• Your group will be divided into teams in a heated and timed challenge.
• This interactive cooking event offers a fun spirited competition, complete with judging and an award ceremony.
• The winning team wins a prize based on presentation, teamwork, and of course taste.
• Special diets:
We offer Gluten-free Cooking, Vegan/Vegetarian Cooking, Dairy-free cooking
• Introduction to Wine
There are many misconceptions and myths surrounding the subject of wine. Ultimately, though, it is nothing but a beverage enjoyed and celebrated around the world and has been for thousands of years. It only takes a handful of purchases from the corner liquor store to come to some conclusions about which wines you like and which are better left on the shelf.
The easy part is deciding if you like a wine or not. The difficult part is understanding why. What do you like ab out it, and how do you communicate your feelings? Is it light or full bodied? Tannic or smooth and supple? What are tannins anyway? Is it fruity, sweet, dry... ? Do fruity and sweet mean the same thing? You will conquer all of these techniques and overcome wine intimidation in our 2-hour class in either your own home or one of our locations.
Wine is most definitely a subject that the more you learn, the more you want to continue discovering. With this class, an entire new world will be yours for the taking.
Catering: Along with personal cooking, California Table offers our same core promise in utilizing local, organic foods for catering, as well. Whether you have a business holiday party or are hosting an event in your home, we have expert staff that can carry out any task. Name your theme and we have your party.
Of course while this is all going on we are still continuing one-on-one and small group cooking classes in your kitchens practicing California Table's core values utilizing locally fresh and sustainable organic agriculture.
Here's a cute youtube video, "Store Wars", about our fight on organic in supermarkets.
The new year is bringing new promises for upcoming cooking classes and demonstrations. California Table now has a kitchen space available for larger groups. Here are just some of the classes available:
• Cheese Class w/ Wine Option (Wine Expert Brian Havens)
While there are many ways to classify and categorize cheese, different cheeses are, at their core, intimately tied to their places of origin. One of the best ways to survey all of the different types of cheeses and learn about their similarities and differences is by looking to the great cheese making countries and regions of the world as a guidepost. These classes offer an opportunity to taste all the best in artisan cheese – from fresh to aged, cow to sheep to goat, light and grassy to pungent and earthy – covering Cheeses of California foremost, France, Italy, and Cheeses of Spain
• Food/Ingredient of the Month
Northern California explodes with new flavors and super-star ingredients multiple times per season. Join us in these classes to celebrate the changing of the season and the foods that accompany it. We will be utilizing the main ingredietn in 3-4 dishes.
• Sauces and Stocks Class
As any professional chef knows the key to an amazing sauce or dish is in t
he stock. You will learn how fast and easy it is to make pristine stocks and how to utilize them in almost any dish.Sauces are the perfect finishers for any dish- vegetable or protein. Learn some of the classics in this class and how to create beautiful sauces from your homemade stocks.
• Holiday Foods
Everyone needs a helping hand when it comes to entertaining family and loved ones during the holidays. You'll benefit from our tips and techniques for creating an unforgettable feast. Discover timeless recipes and a practical approach to cooking while you prepare and sample traditional holiday flavors and fresh contemporary twists on old favorites.
• For our corporate clients, we offer 'Corporate Team Building' cooking classes and competitions:
• Your group will be divided into teams in a heated and timed challenge.
• This interactive cooking event offers a fun spirited competition, complete with judging and an award ceremony.
• The winning team wins a prize based on presentation, teamwork, and of course taste.
• Special diets:
We offer Gluten-free Cooking, Vegan/Vegetarian Cooking, Dairy-free cooking
• Introduction to Wine
There are many misconceptions and myths surrounding the subject of wine. Ultimately, though, it is nothing but a beverage enjoyed and celebrated around the world and has been for thousands of years. It only takes a handful of purchases from the corner liquor store to come to some conclusions about which wines you like and which are better left on the shelf.
The easy part is deciding if you like a wine or not. The difficult part is understanding why. What do you like ab
out it, and how do you communicate your feelings? Is it light or full bodied? Tannic or smooth and supple? What are tannins anyway? Is it fruity, sweet, dry... ? Do fruity and sweet mean the same thing? You will conquer all of these techniques and overcome wine intimidation in our 2-hour class in either your own home or one of our locations.Wine is most definitely a subject that the more you learn, the more you want to continue discovering. With this class, an entire new world will be yours for the taking.
Catering:
Along with personal cooking, California Table offers our same core promise in utilizing local, organic foods for catering, as well. Whether you have a business holiday party or are hosting an event in your home, we have expert staff that can carry out any task. Name your theme and we have your party. Of course while this is all going on we are still continuing one-on-one and small group cooking classes in your kitchens practicing California Table's core values utilizing locally fresh and sustainable organic agriculture.
Here's a cute youtube video, "Store Wars", about our fight on organic in supermarkets.
Friday, December 14, 2007
Mom's Amazing 'Nog!
This recipe was adapted from a 1980's Southern Living Cookbook... We know how them southerners likey the boozy. But be careful with this one. Not only will it hit you over the head sideways if you get carried away enjoying one-too-many glasses, but it's also asking for cholesterol problems!
Cheers! And do enjoy!
Yield: 1 1/2 gallons
2 cups sugar
1 quart half-and-half
8 eggs, separated
1 cup bourbon
1 cup rum
1/2 cup brandy
1 quart whipping cream, whipped
dash of salt
freshly grated nutmeg
Combine sugar and half-and-half, stirring until sugar dissolves; set aside.
Beat egg yolks at medium speed of mixer until thick and lemon colored. Gradually add bourbon, rum, and brandy, beating constantly at low speed. Add half-and-half mixture gradually to yolk mixture, stirring well.
Beat egg whites (at room temperature) until stiff peaks form. Gently fold into yolk mixture. Fold in whipped cream and salt. Chill thoroughly for a few hours. Make sure you stir before serving so you're not left with all cream or all booze. Sprinkle with nutmeg.
Cheers! And do enjoy!
Yield: 1 1/2 gallons
2 cups sugar
1 quart half-and-half
8 eggs, separated
1 cup bourbon
1 cup rum
1/2 cup brandy
1 quart whipping cream, whipped
dash of salt
freshly grated nutmeg
Combine sugar and half-and-half, stirring until sugar dissolves; set aside.
Beat egg yolks at medium speed of mixer until thick and lemon colored. Gradually add bourbon, rum, and brandy, beating constantly at low speed. Add half-and-half mixture gradually to yolk mixture, stirring well.
Beat egg whites (at room temperature) until stiff peaks form. Gently fold into yolk mixture. Fold in whipped cream and salt. Chill thoroughly for a few hours. Make sure you stir before serving so you're not left with all cream or all booze. Sprinkle with nutmeg.
Thursday, November 15, 2007
Brussels Sprouts- The New Turkeyday Thread
Brussels sprouts anyone? Now let’s not be too quick judge here. I know growing up I never especially liked them. Those nose-wrinkling wads of cruciferous terror were always a little too mushy, a little to bitter, and their army green color was definitely sore on the eyes.
Good thing we’ve come a long way since the days of Betty Crocker. And good thing we are also more aware of when these little buggers are at their best. The colder months always grow sweeter sprouts with more compact heads.

What balances out the bitter in the Brussels? Sugar, acid, and salt. So let’s try some sprouts with a lemon confit (a simple syrup with equal parts sugar to water with some lemon zest thrown in). The sugar caramelizes when cooking and creates a beautiful balance while glazing everything a savory-sweet. Bacon is in this recipe, too, but feel free to leave it out for the vegetarians and leave out the butter in the end for vegans.
1 pound of Brussels sprouts, outer leaves peeled and bottom cores trimmed
4 strips of applewood smoked bacon, sliced ¼” across
2 Tablespoons butter
2 lemons zested
1/4-cup water
1/4-cup sugar
To make the simple syrup, warm the 1/4 cup of water and add the 1/4 cup of sugar, stirring until everything has dissolved. Add the zest of two lemons and cook on low for about 5 minutes.
Now that that's out of the way, let's pre-boil the Brussels sprouts. This will give a head start when we sauté later and guarantee they won’t crisp too much on the outside before finishing cooking internally. Fill a 6-quart pot with water, adding enough salt to taste like a salty soup and bring it to a boil. Add the Brussels sprouts. Cook until just before they are fork tender. Remember, we’re still cooking them more later so don’t cook them all the way here. Drain and drop them into ice water in order to retain their green color (versus allowing them to continue to cook because of their residual heat, turning that god-awful army green color). As soon as they have cooled, drain and set aside.
Now, heat a sauté pan over medium heat and add the bacon, allowing the fat to melt, rendering it, without moving it around too much. Once the bacon starts to crisp, remove it temporarily to a plate, leaving the rendered fat in the pan. Add the Brussels sprouts and turn the heat up to medium-high and add a teaspoon of salt. Roll the sprouts around in the bacon love for about 4 minutes. Add the lemon syrup with the bacon into the pan, making sure everything gets coated. Throw the butter in at this point to finish. Once the butter has melted and the Brussels start to brown and crisp, you’re done!
You can even try some toasted pecans for an extra crunch.

Good thing we’ve come a long way since the days of Betty Crocker. And good thing we are also more aware of when these little buggers are at their best. The colder months always grow sweeter sprouts with more compact heads.

What balances out the bitter in the Brussels? Sugar, acid, and salt. So let’s try some sprouts with a lemon confit (a simple syrup with equal parts sugar to water with some lemon zest thrown in). The sugar caramelizes when cooking and creates a beautiful balance while glazing everything a savory-sweet. Bacon is in this recipe, too, but feel free to leave it out for the vegetarians and leave out the butter in the end for vegans.
1 pound of Brussels sprouts, outer leaves peeled and bottom cores trimmed
4 strips of applewood smoked bacon, sliced ¼” across
2 Tablespoons butter
2 lemons zested
1/4-cup water
1/4-cup sugar
To make the simple syrup, warm the 1/4 cup of water and add the 1/4 cup of sugar, stirring until everything has dissolved. Add the zest of two lemons and cook on low for about 5 minutes.
Now that that's out of the way, let's pre-boil the Brussels sprouts. This will give a head start when we sauté later and guarantee they won’t crisp too much on the outside before finishing cooking internally. Fill a 6-quart pot with water, adding enough salt to taste like a salty soup and bring it to a boil. Add the Brussels sprouts. Cook until just before they are fork tender. Remember, we’re still cooking them more later so don’t cook them all the way here. Drain and drop them into ice water in order to retain their green color (versus allowing them to continue to cook because of their residual heat, turning that god-awful army green color). As soon as they have cooled, drain and set aside.
Now, heat a sauté pan over medium heat and add the bacon, allowing the fat to melt, rendering it, without moving it around too much. Once the bacon starts to crisp, remove it temporarily to a plate, leaving the rendered fat in the pan. Add the Brussels sprouts and turn the heat up to medium-high and add a teaspoon of salt. Roll the sprouts around in the bacon love for about 4 minutes. Add the lemon syrup with the bacon into the pan, making sure everything gets coated. Throw the butter in at this point to finish. Once the butter has melted and the Brussels start to brown and crisp, you’re done!
You can even try some toasted pecans for an extra crunch.

Monday, November 12, 2007
Thanksgiving Countdown...The Best Mashed Potatoes
The next few posts will be all about the Turkey Day with tried and true recipes to help you prepare.
Today... The Best Mashers!
For 4 servings, plus some left-overs
This mashed potato recipe is all about the potatoes (well, and the butter, cream, and salt mmmm…). I’ve outlined some tricks and secrets for the best mashed potatoes your Thanksgivings have ever seen.
• Since this recipe is all about the potato, let’s make sure we get the right ones. Yukon potatoes are known for being moist and creamy yielding velvety mashed potatoes, but a little too waxy. Russets are naturally mealier because their cells separate when cooked and result in dryer mashes potatoes. But when the two are mixed they become the perfect result.
• We make sure to never let the potatoes reach a full boil during cooking which will break the potatoes apart, creating waterlogged results. The lovely salted water should only gently simmer at all times.
• After the potatoes are cooked to fork tender, we drain the potatoes through a colander and then spread them out on a sheet pan. Throw them in the oven for 2 minutes to steam out the excess water from around and inside the potatoes.
• One more trick, and possibly the most important, is processing the potatoes through a food mill versus a Kitchen Aid or food processor. The potatoes will be airy and fluffy without being overworked which makes the potatoes gluey and pasty. Check out Sur La Table for food mills or even Amazon.com.
So let’s make sure you have all the equipment together before starting; a colander, food mill, and sheet pan (or large sauté pan).
4 Large Yukon Potatoes, peeled and quartered
2 Russet Potato, peeled and quartered
1 Pint Cream
4 T Butter, softened
Pre-heat your oven to 350°F.
Place the yukons in a 6-quart pot, or a pot that will slightly crowd the potatoes. Add enough water to cover the potatoes by one inch. Add one tablespoon of salt. In another pot, do the same with the russet potatoes and add 1/2 tablespoon of salt. It is important to cook the potatoes separately because they will be done at different times.
Place the pots of potatoes and water on the stove and turn the heat on high. As soon as the water looks like it’s going to boil, turn it way down to barely a simmer. Let’s call it a “shimmer”. Taste the water for salt. It should taste like a salty soup. If it needs more salt, add now.
In about ten minutes, probe the potatoes with a fork. You want them cooked all the way through. If they are still a little hard, continue to cook. When they are fork tender, you are now ready to carefully remove the pot from the heat and pour everything through a colander. Be careful for the steam.
Place the cooked and strained potatoes onto a sheet pan and pop into the oven for 2 minutes.
Once you’ve removed the potatoes form the oven, you’re ready to process them through the food mill. Place the food mill over the taller of your two pots you just cooked the potatoes in. Careful not to dump all the potatoes at once through the mill, but a few pieces at a time, mill them, turning clockwise and every now and then reversing to help little bits through to the pot underneath.
Once all the potatoes have been milled through, scald your cream. This means to warm the cream in a pan on the stove, but be very careful not to let it boil over. That is a huge mess! Add half of the cream to the potatoes and half of your softened butter. Carefully, fold in the ingredients, just until everything has been absorbed. Taste for salt. Add more if necessary, which should be the case.
[At this point, you may cover the potatoes with parchment and set aside if you’re not ready to serve them. The great thing about this is they can be made an hour or so ahead of time allowing you to finish other things for dinner. When you are ready, simply re-warm the rest of the cream and butter and add to the potato pot over a warm burner. The more you stir the potatoes, the stiffer their outcome will be, so take care to not over-agitate them. But note that more moisture will have evaporated with more time sitting, so you may need to add more cream and butter.]
If you're immediately serving the potatoes after milling, add as much cream and butter that suits your taste.
They are now ready to serve!
Today... The Best Mashers!
For 4 servings, plus some left-overs
This mashed potato recipe is all about the potatoes (well, and the butter, cream, and salt mmmm…). I’ve outlined some tricks and secrets for the best mashed potatoes your Thanksgivings have ever seen.
• Since this recipe is all about the potato, let’s make sure we get the right ones. Yukon potatoes are known for being moist and creamy yielding velvety mashed potatoes, but a little too waxy. Russets are naturally mealier because their cells separate when cooked and result in dryer mashes potatoes. But when the two are mixed they become the perfect result.
• We make sure to never let the potatoes reach a full boil during cooking which will break the potatoes apart, creating waterlogged results. The lovely salted water should only gently simmer at all times.
• After the potatoes are cooked to fork tender, we drain the potatoes through a colander and then spread them out on a sheet pan. Throw them in the oven for 2 minutes to steam out the excess water from around and inside the potatoes.
• One more trick, and possibly the most important, is processing the potatoes through a food mill versus a Kitchen Aid or food processor. The potatoes will be airy and fluffy without being overworked which makes the potatoes gluey and pasty. Check out Sur La Table for food mills or even Amazon.com.
So let’s make sure you have all the equipment together before starting; a colander, food mill, and sheet pan (or large sauté pan).
4 Large Yukon Potatoes, peeled and quartered
2 Russet Potato, peeled and quartered
1 Pint Cream
4 T Butter, softened
Pre-heat your oven to 350°F.
Place the yukons in a 6-quart pot, or a pot that will slightly crowd the potatoes. Add enough water to cover the potatoes by one inch. Add one tablespoon of salt. In another pot, do the same with the russet potatoes and add 1/2 tablespoon of salt. It is important to cook the potatoes separately because they will be done at different times.
Place the pots of potatoes and water on the stove and turn the heat on high. As soon as the water looks like it’s going to boil, turn it way down to barely a simmer. Let’s call it a “shimmer”. Taste the water for salt. It should taste like a salty soup. If it needs more salt, add now.
In about ten minutes, probe the potatoes with a fork. You want them cooked all the way through. If they are still a little hard, continue to cook. When they are fork tender, you are now ready to carefully remove the pot from the heat and pour everything through a colander. Be careful for the steam.
Place the cooked and strained potatoes onto a sheet pan and pop into the oven for 2 minutes.
Once you’ve removed the potatoes form the oven, you’re ready to process them through the food mill. Place the food mill over the taller of your two pots you just cooked the potatoes in. Careful not to dump all the potatoes at once through the mill, but a few pieces at a time, mill them, turning clockwise and every now and then reversing to help little bits through to the pot underneath.
Once all the potatoes have been milled through, scald your cream. This means to warm the cream in a pan on the stove, but be very careful not to let it boil over. That is a huge mess! Add half of the cream to the potatoes and half of your softened butter. Carefully, fold in the ingredients, just until everything has been absorbed. Taste for salt. Add more if necessary, which should be the case.
[At this point, you may cover the potatoes with parchment and set aside if you’re not ready to serve them. The great thing about this is they can be made an hour or so ahead of time allowing you to finish other things for dinner. When you are ready, simply re-warm the rest of the cream and butter and add to the potato pot over a warm burner. The more you stir the potatoes, the stiffer their outcome will be, so take care to not over-agitate them. But note that more moisture will have evaporated with more time sitting, so you may need to add more cream and butter.]
If you're immediately serving the potatoes after milling, add as much cream and butter that suits your taste.
They are now ready to serve!
Tuesday, November 6, 2007
Lawsuit Against Dole, Chiquita, & Del Monte for Poisoning Banana Workers!
Just when we thought we understood everything about bananas... we love'em, they're one of the "safest" fruits to eat when not organic (because of their thick skin screening out 'most' of the poisons in pesticides), and they're the easiest fruit/vegetable to digest. This fruit comes in the handy when we need to grab something to go, or for athletes who need quick sugars and potassium. Bananas have been one of my favorite foods since I can remember eating food.
Education on conventional foods has taught us about the negative environmental factors. We've also learned that conventional foods carry some of the toxins they’re sprayed with. Even after scrubbing down an apple, or plum, or carrot... the toxin is still inside waiting to be eaten by the foolish human who buys it.
What we haven't learned or put too much thought into are the effects pesticides have on the pickers who harvest them. These workers have their hands on, in, around these toxins all day, everyday.
Organic Consumers Association states “thousands of banana pickers in Costa Rica have filed a lawsuit in Los Angeles against two chemical companies and three major U.S. fresh produce companies, claiming exposure to a toxic pesticide caused a range of reproductive disorders.” The company is accused of using a pesticide that was banned in the U.S. in 1979 called dibromochloropropane. The chemical was used to kill microscopic worms on the roots of the banana plants. Possible side effects of this pesticide when inhaled or absorbed by the skin of are sterility, testicular atrophy, miscarriages, birth defects, liver damage and cancer.
The workers stated the companies conducted a "settlement campaign". The plaintiffs who were exposed to the pesticide were induced to sign releases freeing the companies of liability. Organic Consumers Association says the companies allegedly offered to settle the claims for sterility for $2,900 to $6,500 a piece as long as the workers did not involve their own lawyers says . CBS News says that according to the lawsuit manufacturers of the pesticide, "actively suppressed information about DBCP's reproductive toxicity".
Luckily this was finally all brought to the surface and these workers are getting paid for their losses. Los Angeles jury awarded $3.3 million to six workers on Monday. Still, nothing will ever repay the loss of sterility or miscarriages. I hope we've all learned more of a lesson in how important buying organic. Not only are we saving ourselves and the environment by, but we are also saving the innocent and hard-working farmers.
Education on conventional foods has taught us about the negative environmental factors. We've also learned that conventional foods carry some of the toxins they’re sprayed with. Even after scrubbing down an apple, or plum, or carrot... the toxin is still inside waiting to be eaten by the foolish human who buys it.
What we haven't learned or put too much thought into are the effects pesticides have on the pickers who harvest them. These workers have their hands on, in, around these toxins all day, everyday.
Organic Consumers Association states “thousands of banana pickers in Costa Rica have filed a lawsuit in Los Angeles against two chemical companies and three major U.S. fresh produce companies, claiming exposure to a toxic pesticide caused a range of reproductive disorders.” The company is accused of using a pesticide that was banned in the U.S. in 1979 called dibromochloropropane. The chemical was used to kill microscopic worms on the roots of the banana plants. Possible side effects of this pesticide when inhaled or absorbed by the skin of are sterility, testicular atrophy, miscarriages, birth defects, liver damage and cancer.
The workers stated the companies conducted a "settlement campaign". The plaintiffs who were exposed to the pesticide were induced to sign releases freeing the companies of liability. Organic Consumers Association says the companies allegedly offered to settle the claims for sterility for $2,900 to $6,500 a piece as long as the workers did not involve their own lawyers says . CBS News says that according to the lawsuit manufacturers of the pesticide, "actively suppressed information about DBCP's reproductive toxicity".
Luckily this was finally all brought to the surface and these workers are getting paid for their losses. Los Angeles jury awarded $3.3 million to six workers on Monday. Still, nothing will ever repay the loss of sterility or miscarriages. I hope we've all learned more of a lesson in how important buying organic. Not only are we saving ourselves and the environment by, but we are also saving the innocent and hard-working farmers.
Monday, October 29, 2007
Is Fish Farming Our Future?
Sustainability. Isn't that what we're all shooting for? Defined as a process or state that can be maintained at a certain level indefinitely. Indefinitely means forever or for a long time, no end defined. In advocating sustainable food we are attempting to create and support environmental stewardship, farm profitability, and prosperous farming communities. In doing so we are ensuring the future of our healthy food will be there when we need it. Sounds logical, right? But for some reason, not everyone is catching on.
So what do we do about the sustainability of our oceans and it’s living organisms? I mean, we continue to pollute it with oil spills, trash, toxic waste, etc, let alone over fishing it to the point that we are actually running out of fish! A 2003 study in the journal, Nature, reported that up to 90 percent of the stocks of the ocean’s major predators (Atlantic cod and blue fin tuna) have been wiped out. NYTimes

How has it gotten to this point? Tuna fish was once considered “Chicken of the Sea” because it was so plentiful and in high demand as the chickens running amuck our dry land today. Oh, how these days have passed. If the whole world stopped eating fish for two years, maybe even just one, there would be a chance our fish populations could possibly bounce back. The chances of that happening? Slim to none. Instead of fisheries slowing down their production, they’re going to whatever extremes necessary to make their money now, before there’s nothing left at all.

Commercial fishing, once viewed as a proud job, was passed along family businesses from generation to generation. Those days are coming to an end because of the bad rap the fishing industry has created from pollution and bycatch (unwanted fish and animals caught). Let's look at some of the more well-known techniques; “trolling”, “longlining”, “hook and line caught”, and of course the now taboo method of “dredging”. The latter, dredging, is when farmers drag a heavy frame with an attached mesh bag (the dredge) along the seafloor to catch bottom-dwelling shellfish. Some dredges have metal “teeth” along the base of the frame that act like a rake. Dredges cause significant habitat damage as they destroy all flora and fauna in its path and smooth out sandy and muddy bottom habitats, as well as catching bycatch. If you want to learn more about these issues, visit the Monterey Bay Aquarium site.
Longlining sometimes gets confused with “Hook and Line Caught”. But don’t be fooled by their similar names. Hook and Line is the old-fashioned and trusty way of using a single line with one or two hooks and bait. As each caught is made, its wound in where the fisherman can quickly release unwanted catch from their hooks, keeping what they’re after. There is no habitat damage and the possible bycatch are released. The other technique, longlining, is a fish line that can be 1 mile to 50 miles long and is pulled alongside the boat for hours. Sea turtles, birds, sharks, and other fish are accidentally caught, killed unnecessarily, and end up being pulled along side for hours at a time.
Farming, another taboo word could possibly be our temporary answer. If we can learn to harvest wild fish sustainably then we will have succeeded in something we have failed at on land: finding a balance with a naturally productive ecosystem. We first need to be able to differentiate salmon farming and it’s foul history from the new possible standards. Salmon farming has given rise to numerous controversial issues including what is being fed to these fish, how it’s transmitted to our bodies, what it’s doing to our economy, and how it’s polluting our natural waters. PCB (polychlorinated biphenyls, a toxin) is found in all fish, but when the farmed salmon are fed fish pellets (ground fish meal and oils made from fish) their whole life, their numbers of PCBs are much higher than wild salmon which only start to feed on other fish with PCB as they are mature adults. Before the wild salmon have grown large enough to feed on small fish, they feed on tiny crustaceans called krill. These crustaceans have naturally occurring pigments that give salmon their beautiful orange color. Farmed salmon never have the opportunity to feed on krill, only being fed fish meal their whole lives, so their natural color is an unattractive gray color. Who wants to eat gray salmon?? They are in turn fed artificial pigments inside their meal in order to turn their flesh orange. Kinda gross, no?

In What to Eat, author Marion Nestle goes into great detail about our fish farming pr oblems. She explains that along with the pollution from the waste of the farmed salmon spilling into our waters and harming the wild life, the salmon often escape their pins entering the natural waters. They can then mate with other types of salmon, spawning mutant species. If their levels of PCBs are higher than normal already, then they're introducing more toxins into the waters to be eaten by other fish. And, in case you're curious, just a few of the terrible health conditions that result from extreme exposure to PCBs include skin problems, reproduction difficulty, mental and physical developmental delays, and behavior problems. Scientists are still uncertain to what the small amounts of PCB found in wild fish will do. Hmm.

There are fish farms out there that are attempting to make a difference in the farming industry. Kona Kampachi of Kona Blue for example, a cousin of the Japanese Hamachi, similar to Hawaii’s Amberjack, has been farmed a half mile off the coast of Hawaii for a few years now. Cages that are 200-250 feet under the water hold fish that are kept and fed until they're mat ure enough, and in high enough demand, to sell. Hatching actually begins on land from a stock of fish caught off the coast and brought into holding tanks until they’ve become acclimated enough to start spawning. The eggs are then carefully transferred to the on-land hatchery until hatched where they are fed plankton for three weeks. Then the fish are weaned on to pellet-feed, made from vegetable-based proteins, PCB and hormone-free fishmeal, and fish oil. They are then transferred to the open waters where strong currents keep the fish moving and happy with minimal environmental issues. If any fish do escape during the exchanges, there is no risk in harming other wild fish in the open waters because they are not genetically modified and these are their natural waters.
Offshore fish farming is still really new so there’s no track record yet on the environmental issues. Up to this point fish farming has been done incorrectly and created more harm than good. But there is such a thing as sustainable farming and I think it can be pulled off in the fish industry, as well. At this point I believe we should be open to this idea as our oceans are in critical times and in danger of being wiped clean. At least until our wildlife can make a come back. If we can farm turkeys on land for our massive consumptions during the silly holiday, "Thanksgiving", then we should be able to consider fish farming a safe means, as well.

So what do we do about the sustainability of our oceans and it’s living organisms? I mean, we continue to pollute it with oil spills, trash, toxic waste, etc, let alone over fishing it to the point that we are actually running out of fish! A 2003 study in the journal, Nature, reported that up to 90 percent of the stocks of the ocean’s major predators (Atlantic cod and blue fin tuna) have been wiped out. NYTimes
How has it gotten to this point? Tuna fish was once considered “Chicken of the Sea” because it was so plentiful and in high demand as the chickens running amuck our dry land today. Oh, how these days have passed. If the whole world stopped eating fish for two years, maybe even just one, there would be a chance our fish populations could possibly bounce back. The chances of that happening? Slim to none. Instead of fisheries slowing down their production, they’re going to whatever extremes necessary to make their money now, before there’s nothing left at all.

Commercial fishing, once viewed as a proud job, was passed along family businesses from generation to generation. Those days are coming to an end because of the bad rap the fishing industry has created from pollution and bycatch (unwanted fish and animals caught). Let's look at some of the more well-known techniques; “trolling”, “longlining”, “hook and line caught”, and of course the now taboo method of “dredging”. The latter, dredging, is when farmers drag a heavy frame with an attached mesh bag (the dredge) along the seafloor to catch bottom-dwelling shellfish. Some dredges have metal “teeth” along the base of the frame that act like a rake. Dredges cause significant habitat damage as they destroy all flora and fauna in its path and smooth out sandy and muddy bottom habitats, as well as catching bycatch. If you want to learn more about these issues, visit the Monterey Bay Aquarium site.
Longlining sometimes gets confused with “Hook and Line Caught”. But don’t be fooled by their similar names. Hook and Line is the old-fashioned and trusty way of using a single line with one or two hooks and bait. As each caught is made, its wound in where the fisherman can quickly release unwanted catch from their hooks, keeping what they’re after. There is no habitat damage and the possible bycatch are released. The other technique, longlining, is a fish line that can be 1 mile to 50 miles long and is pulled alongside the boat for hours. Sea turtles, birds, sharks, and other fish are accidentally caught, killed unnecessarily, and end up being pulled along side for hours at a time.
Farming, another taboo word could possibly be our temporary answer. If we can learn to harvest wild fish sustainably then we will have succeeded in something we have failed at on land: finding a balance with a naturally productive ecosystem. We first need to be able to differentiate salmon farming and it’s foul history from the new possible standards. Salmon farming has given rise to numerous controversial issues including what is being fed to these fish, how it’s transmitted to our bodies, what it’s doing to our economy, and how it’s polluting our natural waters. PCB (polychlorinated biphenyls, a toxin) is found in all fish, but when the farmed salmon are fed fish pellets (ground fish meal and oils made from fish) their whole life, their numbers of PCBs are much higher than wild salmon which only start to feed on other fish with PCB as they are mature adults. Before the wild salmon have grown large enough to feed on small fish, they feed on tiny crustaceans called krill. These crustaceans have naturally occurring pigments that give salmon their beautiful orange color. Farmed salmon never have the opportunity to feed on krill, only being fed fish meal their whole lives, so their natural color is an unattractive gray color. Who wants to eat gray salmon?? They are in turn fed artificial pigments inside their meal in order to turn their flesh orange. Kinda gross, no?
In What to Eat, author Marion Nestle goes into great detail about our fish farming pr
 oblems. She explains that along with the pollution from the waste of the farmed salmon spilling into our waters and harming the wild life, the salmon often escape their pins entering the natural waters. They can then mate with other types of salmon, spawning mutant species. If their levels of PCBs are higher than normal already, then they're introducing more toxins into the waters to be eaten by other fish. And, in case you're curious, just a few of the terrible health conditions that result from extreme exposure to PCBs include skin problems, reproduction difficulty, mental and physical developmental delays, and behavior problems. Scientists are still uncertain to what the small amounts of PCB found in wild fish will do. Hmm.
There are fish farms out there that are attempting to make a difference in the farming industry. Kona Kampachi of Kona Blue for example, a cousin of the Japanese Hamachi, similar to Hawaii’s Amberjack, has been farmed a half mile off the coast of Hawaii for a few years now. Cages that are 200-250 feet under the water hold fish that are kept and fed until they're mat
 ure enough, and in high enough demand, to sell. Hatching actually begins on land from a stock of fish caught off the coast and brought into holding tanks until they’ve become acclimated enough to start spawning. The eggs are then carefully transferred to the on-land hatchery until hatched where they are fed plankton for three weeks. Then the fish are weaned on to pellet-feed, made from vegetable-based proteins, PCB and hormone-free fishmeal, and fish oil. They are then transferred to the open waters where strong currents keep the fish moving and happy with minimal environmental issues. If any fish do escape during the exchanges, there is no risk in harming other wild fish in the open waters because they are not genetically modified and these are their natural waters.
Offshore fish farming is still really new so there’s no track record yet on the environmental issues. Up to this point fish farming has been done incorrectly and created more harm than good. But there is such a thing as sustainable farming and I think it can be pulled off in the fish industry, as well. At this point I believe we should be open to this idea as our oceans are in critical times and in danger of being wiped clean. At least until our wildlife can make a come back. If we can farm turkeys on land for our massive consumptions during the silly holiday, "Thanksgiving", then we should be able to consider fish farming a safe means, as well.
Monday, October 22, 2007
Cooking the Perfect Beans!
With bean season here in our beautiful Northern California fall, let's make sure we cook them successfully and deliciously.
Cannelinis, Navys, Gigantes, Garbanzos, Limas, Cranberry, Favas, Lentils, Flageolet, Great Northern, Mung, Pinto, Kidney… There’s definitely a bean for everyone. No matter what variety and/or recipe, there are a few important bean factors to take into consideration.
Soaking the beans over night may reduce your total cooking time but it’s not absolutely necessary. I’ve been cooking beans straight from their packaging for the past 6 years and never had a problem. Though rumor has it, soaking your bean and changing the water a few times cuts down on the flatulence-producing enzymes. Hmm, this will be for you to try and found out.
The common bean is made up of 22% protein, 61% carbohydrate, and 2% fat making these little legumes an all-around bundle of health. And some of us may remember learning in grade school what a bean is comprised of; the inner cotyledon, the embryo, and the outer seed coat. Why am I bringing up these lost memories of science class? Because in order to understand how to cook a bean properly it’s best to know how it works. The cell walls of beans will soften more readily in alkaline solutions, not acidic or salty. One of the most common mistakes people make when cooking these little buggers is adding salt to the liquid in the beginning of the process. This is the biggest no-no! Never, no matter how long you cook them, their skins, or shells, will never soften past a snappy crunch. Even veteran chili makers know that adding uncooked beans straight into their acidic and salty sauces will not speed up the process and absorption of flavor, but result in beans that seem to be uncooked. They will feel done and creamy in the middle, but still have a lingering rawness in the outside shell. But then we run across the problem of having beans that aren’t seasoned enough, or at all. So where does the salt come into play?? The solution to this problem all comes with the timing in the salting.
70%-80% done is a general rule of thumb when to add salt. I lean more toward the 80% side. How do you know when your beans have reached this level of done-ness? You can either bite into the bean to test the rawness of the core, or you can break open the bean and look into the middle. When a bean still has time left it will have a little white dot in the middle showing you your hot liquid has not permeated it yet. The amount of salt for your recipe depends on how many beans you’re working with and how much liquid. I generally salt the liquid until it tastes like a salty soup when there’s 20% time left.
Speaking of the bean liquid, it contains most of the ingredients of a veggie stock, so I always triple the amount of water to bean ratio, saving the excess liquid for stock with added starch (from the beans) for soups and braises. I simply ladle the excess liquid off the top of the bean pot and poor it through a strainer to leave out any little bits.
One more tip to creating the perfect beans is adding in olive oil to your water in the beginning of the cooking process. This results in a more velvety texture in the bean and the broth will taste richer.
Bean Recipe: For 5 pounds of dry beans
1 Carrot, peeled
2 Ribs of celery
¼ Yellow onion
4 Sprigs of thyme
3-4 Smashed cloves of garlic
3 Tb. Extra Virgin Olive Oil
Salt to taste
For 5 pounds of beans, use a 4-6 quart pot. Place the beans in the pot along with the remaining ingredients (except the salt). Add enough water to cover the beans by 3-4 inches. Bring the water to a light boil and then reduce to a simmer. Depending on what type of bean you’ve decided to cook, total cooking time will vary. Try checking the status of your bean in 30-minute intervals. Remember. Don’t add the salt until the beans are 80% done or add uncooked beans into acidic sauces!
Cannelinis, Navys, Gigantes, Garbanzos, Limas, Cranberry, Favas, Lentils, Flageolet, Great Northern, Mung, Pinto, Kidney… There’s definitely a bean for everyone. No matter what variety and/or recipe, there are a few important bean factors to take into consideration.
Soaking the beans over night may reduce your total cooking time but it’s not absolutely necessary. I’ve been cooking beans straight from their packaging for the past 6 years and never had a problem. Though rumor has it, soaking your bean and changing the water a few times cuts down on the flatulence-producing enzymes. Hmm, this will be for you to try and found out.
The common bean is made up of 22% protein, 61% carbohydrate, and 2% fat making these little legumes an all-around bundle of health. And some of us may remember learning in grade school what a bean is comprised of; the inner cotyledon, the embryo, and the outer seed coat. Why am I bringing up these lost memories of science class? Because in order to understand how to cook a bean properly it’s best to know how it works. The cell walls of beans will soften more readily in alkaline solutions, not acidic or salty. One of the most common mistakes people make when cooking these little buggers is adding salt to the liquid in the beginning of the process. This is the biggest no-no! Never, no matter how long you cook them, their skins, or shells, will never soften past a snappy crunch. Even veteran chili makers know that adding uncooked beans straight into their acidic and salty sauces will not speed up the process and absorption of flavor, but result in beans that seem to be uncooked. They will feel done and creamy in the middle, but still have a lingering rawness in the outside shell. But then we run across the problem of having beans that aren’t seasoned enough, or at all. So where does the salt come into play?? The solution to this problem all comes with the timing in the salting.
70%-80% done is a general rule of thumb when to add salt. I lean more toward the 80% side. How do you know when your beans have reached this level of done-ness? You can either bite into the bean to test the rawness of the core, or you can break open the bean and look into the middle. When a bean still has time left it will have a little white dot in the middle showing you your hot liquid has not permeated it yet. The amount of salt for your recipe depends on how many beans you’re working with and how much liquid. I generally salt the liquid until it tastes like a salty soup when there’s 20% time left.
Speaking of the bean liquid, it contains most of the ingredients of a veggie stock, so I always triple the amount of water to bean ratio, saving the excess liquid for stock with added starch (from the beans) for soups and braises. I simply ladle the excess liquid off the top of the bean pot and poor it through a strainer to leave out any little bits.
One more tip to creating the perfect beans is adding in olive oil to your water in the beginning of the cooking process. This results in a more velvety texture in the bean and the broth will taste richer.
Bean Recipe: For 5 pounds of dry beans
1 Carrot, peeled
2 Ribs of celery
¼ Yellow onion
4 Sprigs of thyme
3-4 Smashed cloves of garlic
3 Tb. Extra Virgin Olive Oil
Salt to taste
For 5 pounds of beans, use a 4-6 quart pot. Place the beans in the pot along with the remaining ingredients (except the salt). Add enough water to cover the beans by 3-4 inches. Bring the water to a light boil and then reduce to a simmer. Depending on what type of bean you’ve decided to cook, total cooking time will vary. Try checking the status of your bean in 30-minute intervals. Remember. Don’t add the salt until the beans are 80% done or add uncooked beans into acidic sauces!
Wednesday, October 3, 2007
Stocking Your Kitchen with Equipment and Tools
A lot of people ask what my favorite and most used kitchen tools are. Seeing how there are so many advertised and confusing items on the market, I’ve composed a short list of my most utilized and accessible tools in the kitchen. This list is derived from a compilation of years working in professional kitchens while serving the masses and using everything under the sun. Starred are the most essential things, but I highly recommend it all if you can. Instead of spending tons of money at big named retail stores on kitchen equipment, make sure to check out used kitchen supply stores and amazon.com or other similar online sites for better deals. I wish we all could have the accessibility to a restaurant kitchen’s equipment, but if we have to cut it down to fit in our home kitchens and budgets, these items will definitely give you a head start.
*6” & 10” Wutshof Chef’s Knife (if you only can have one, I recommend the 8” Chef’s Knife)
*Sharpening Steel
*Tongs
Metal Fish Spatula
*High Temperature Rubber Spatulas
*Wooden Cutting Board (or a sturdy rubber/plastic one)
Tons of kitchen towels for cleaning and hot items
*Digital Meat thermometer
*Whisk
*10” Stainless Steel/Aluminum Core Sauté Pan
8” Aluminum Sauté Pans
4-Quart Stainless Steel Pot
Peeler
Little ceramic/glass bowels for prepped ingredients
Glass/Metal Mixing Bowls
Pepper Grinder
Food Mill
Fine and Medium Sieve
Hand Blender
If you have favorite tools that I haven’t listed, please add them on via comments!
*6” & 10” Wutshof Chef’s Knife (if you only can have one, I recommend the 8” Chef’s Knife)
*Sharpening Steel
*Tongs
Metal Fish Spatula
*High Temperature Rubber Spatulas
*Wooden Cutting Board (or a sturdy rubber/plastic one)
Tons of kitchen towels for cleaning and hot items
*Digital Meat thermometer
*Whisk
*10” Stainless Steel/Aluminum Core Sauté Pan
8” Aluminum Sauté Pans
4-Quart Stainless Steel Pot
Peeler
Little ceramic/glass bowels for prepped ingredients
Glass/Metal Mixing Bowls
Pepper Grinder
Food Mill
Fine and Medium Sieve
Hand Blender
If you have favorite tools that I haven’t listed, please add them on via comments!
Sunday, September 30, 2007
How to Roast the Perfect Chicken!
The roasted chicken has always been a family’s trusted comfort meal. At least in my family it was. Yet how comfortable and trusty is it when the majority of the time these birds come out of the oven overcooked, dry, pale or charred, un-seasoned or has the potential to brine our internal organs, and on some occasions rare. For an un-seasoned cook, one may think the only way to know whether or not the chicken is cooked completely is to cut into the meat to peak or take the bird’s temperature with a thermometer. I don’t know about you, but I never saw my mother using a thermometer to check doneness. I’m not convinced she would have know what she was looking for even if she did check. Typically speaking though, not many of the everyday folk have a reliable, accurate meat thermometer. This is one kitchen tool I highly suggest having around. I prefer to use the battery-run meat thermometers because they’re more dependable. You can easily and affordably grab one from a kitchen supply store. I got mine from Cliff’s Variety store on Castro. The prior option, cutting in to the flesh to peak for doneness seizes the cooking all together, leading to a very wet mess as all the internal juices spill onto the cutting board.
One of the most popular meals to prepare in my cooking classes is the chicken. People are always discussing their anxieties about not being able to do it right. I explain that a lot of it does has to do with your oven and how well it’s calibrated, but no matter how wonky your oven may be, you can still pull of the perfect chicken.
Trusting we all have reliable thermometers, let us first discuss the importance of what kind of chicken to buy before we embark on this wonderful journey of poultry. I can’t stress freshness enough. Almost as much as I can’t stress knowing how your chicken was raised. Grade A roasters are best for well, roasting. The meat can only be as good as it was treated, so go free-range and organic. Happy chickens taste better! And depending on how many people you’re feeding, stick with the smallest bird you can find, of course taking into consideration leftovers. If I’m cooking for myself and one other person, I aim for purchasing a bird around 4 pounds. Try Drewes Bro.s Meat on Church and 30th for these small birds. The reason for buying smaller rather than large is because these little guys pack in a punch of flavor and are easier to manage.
*Note: The chicken must be prepped and salted 24 hours before you want to roast it. Make sure to plan ahead accordingly!
So now we know what kind of bird to get, we’re already ahead of the game. The next step is to properly prep the bird. We’re going to rinse it, dry it, and season it. So before your hands becoming contaminated with the raw bird, get everything ready and in front of you. This includes measuring the salt. Judy Rodgers of Zuni Café has come up with the perfect ratio for salt to pound of bird: ¾ teaspoon of sea salt to every one pound of chicken (kosher salt will be slightly less than ¾ teaspoon). For example, a 4-pound chicken will need 3 teaspoons of salt. Measure out exactly how much salt you will need and put it into a little bowl. Herbs and garlic are other fantastic accompaniments for this rustic meal. My favorite herb to use is fresh thyme along with 6 smashed garlic cloves (other wonderful herbs are mint, basil, parsley, marjoram). So have these things ready on a clean work surface, along with some paper towels, so you’re not fishing through the fridge with chicken hands.
Now you’re ready to work. Always take your new clucker out of the bag when you get it. No need in marinating it in it’s own purged juices (gross). Pull out the offal if included and set it aside for one of your other scrumptious recipes. Rinse the chicken under cold water to rid of the stagnant liquid, and then blot her dry with your paper towels. Really try to get rid of all the excess liquid after rinsing so the salting step can be successful. Lay your bird down on your clean surface. If you’re right handed, dry this hand off to designate it for your salting hand. Start applying the salt at least 12” above the bird to get a more even disbursement. Rotate the chicken with your left hand while salting with your right, turning it over, making sure to get the salt everywhere, including in the creases of the thighs and under the arms. Throw some in the cavity, as well. Once all the salt is spread, use your finger to create a well between the bird’s skin and muscle on each side of the upper breast. Put one clove of smashed garlic in each well along with some leaves of thyme, or your herb of choice. Do this also to the bottom of each breast and the butt of the bird.
Your chicken is now ready to be left alone for 24 wonderful satiated hours! Store your creation on a plate with a dry towel over it. This keeps it protected, with out locking in moisture, causing the skin to dry a little so your end result will be a crispier skin, just what we’re shooting for.
24 hours later at the ranch…
Keep in mind the total coking time will be around 45 minutes. Pre-heat your oven to 475°F with the convection on if you have it. Grab an oven-safe sauté pan large enough to hold your bird and place it over a burner on medium-high heat. Yes, we’re cooking in the pan. Getting the pan hot first will keep the chicken from sticking and tearing its wonderful skin we so carefully prepared once we flip it. Add a little oil to the pan, swirling it around to make sure the entire bottom is lightly and evenly oiled. Test the heat with a little flick of water to see if it sizzles. Once it’s hot enough, add the chicken faced breast side up. Now into the oven the whole thing goes. If you’re not sure if your oven is calibrated, check in 5 minutes to hear for what is going on. It should be gleefully sizzling, a sure sign it’s hot enough. If it seems dead in there, turn your oven up in 25° intervals until you can hear it cooking. On the other hand, if it seems to be going crazy and smoking, turn the oven down in 25°intervals. Let it cook for 25 minutes on this side while keeping an eye on the skin making sure it’s browning nicely. After the first 25 minutes, carefully, with a dry towel or mittens, pull the pan out of the oven, placing it on the stove to stabilize it while you turn the chicken over. I grab the cavity of the chicken with tongs and roll my wrist to turn it, being careful not to splash any rendered chicken fat. If you have convection on, turn it off at this point. And… back into the oven. This is giving the chicken time to crisp the back while putting a nice sear on the breast. We only want to keep it on this side for 5-10 minutes so not to overcook the breast. After 5-10 minutes, depending on how hot you think your oven is cooking, one more turn of the chicken, again taking caution for the extremely hot pan and chicken fat.
At this point, it’s a good idea to check the temperature of the bird to get an idea how close or far it is from being done. In my opinion, the perfect and most succulent chicken will be found at a final temperature of 160°F. This is taking into consideration the carry over temperature, which will range from 5-7°. The smaller the chicken, the more it will raise in internal temperature after it has been removed from the heat source. The larger the chicken, the less it will rise. So if my 4-pound bird is reading 154°F, I will place the chicken on a plate or my cutting board and let it rest for 10-12 minutes, allowing it to finalize around 160°F. If it were a 5-6 pound bird, I would leave it in the oven until 156°F. During this process, make sure your oven door is closed to all the heat isn’t escaping.
Based on this information, take a reading of your chicken’s temperature by inserting the meat thermometer into the breast. You can now estimate how much longer it has let to cook. For example, if it’s at 145°F then you will have at least another 7-10 minutes, or if it’s closer to 150°F, you will have another 3 minutes or so. (Again, all these times can vary based on how hot your oven runs.) After taking the reading, place the chicken back in the oven, breast side up to re-crisp the skin, for probably another 5 minutes, depending on your chicken’s temperature.
Once you have reached your temperature goal, taking into consideration your carry-over time, use the tongs to remove the chicken from the pan and place it on a cutting board to rest. It’s very important to allow your chicken to rest for at least 10 minutes. This is the crucial time it takes for the internal temperature to peak, or finish cooking. If you have waited 10 minutes and cut into the meat to find juices flying out, stop cutting and wait another 2 minutes or so. These are the wonderful juices that we worked so hard to create with our 24-hour advance salting!
And Voila! Your chicken is done! If you don’t eat it all in one night you can look forward to amazing chicken sandwiches and salads! (Try your sandwich with garlic aioli!)
Wednesday, September 19, 2007
Slow Food Movement is...
... definitely becoming more of a common term when describing the restaurants of San Francisco. Some of you may be asking what is it? And why are more and more restaurants signing up to a be a part of it? Basically, it's because these establishments care about us. No, really. Slow Food Movement is a non-profit, member-supported organization. The members are integrating agriculture science and gastronomy in order to educate all of those along the food line and keep them up to date on the most recent findings. From the farm machinery, to the soil, to the food, the workers, and so on. All the way to the market where we, the consumers, hand our trust over to them to feed ourselves and families. It's actually been around since 1989, founded by an Italian, Carlo Petrini, with his campaign against the fast food chain, starting with McDonald's.
Now that we have more of an understanding to what it is, think about the 75 restaurants in San Francisco alone who are associated in this movement. You can consider all of those establishments as educated in food as the farmers. And for someone like myself, knowledge about the food I'm eating is as important as what it taste like. I have this great book, "The Slow Food Guide to San Francisco and the Bay Area - Restaurants, Markets, Bars" by Sylvan Brackett, Wendy Downing and Sue Moore. It's a guide for those of you out there who demand better in their lives, such as fresh, seasonal, and locally grown food. Not only is this book a reference for Slow Foodies in San Francisco, but it's also a great source to just help remember the numerous eateries and forgotten jewels of the bay area. Unfortunately, (or fortunately) since it was published, more restaurants have joined so you won't be able to find every current restaurant listed in the book.
Through some searching, though, I found the most up to date list on Savory San Francisco to help you keep up with the expanding number of newly added. When you're visiting these places, consider it a treat for your body and rest assured it's some of the happiest food you will find. Also, make sure to check out Judy Rodgers (Zuni Cafe) as she shares in her in site to this movement in her video. It's under the long list of restaurants below.
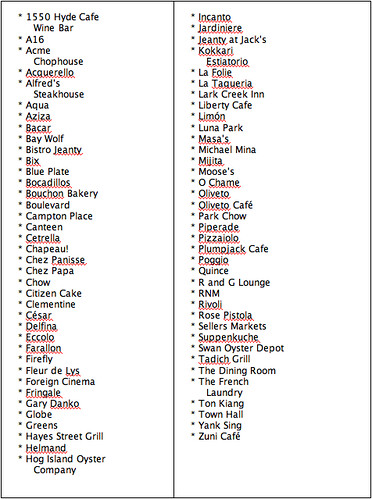
(I think I saw myself somewhere in the back of the kitchen in this video) ;)
Now that we have more of an understanding to what it is, think about the 75 restaurants in San Francisco alone who are associated in this movement. You can consider all of those establishments as educated in food as the farmers. And for someone like myself, knowledge about the food I'm eating is as important as what it taste like. I have this great book, "The Slow Food Guide to San Francisco and the Bay Area - Restaurants, Markets, Bars" by Sylvan Brackett, Wendy Downing and Sue Moore. It's a guide for those of you out there who demand better in their lives, such as fresh, seasonal, and locally grown food. Not only is this book a reference for Slow Foodies in San Francisco, but it's also a great source to just help remember the numerous eateries and forgotten jewels of the bay area. Unfortunately, (or fortunately) since it was published, more restaurants have joined so you won't be able to find every current restaurant listed in the book.
Through some searching, though, I found the most up to date list on Savory San Francisco to help you keep up with the expanding number of newly added. When you're visiting these places, consider it a treat for your body and rest assured it's some of the happiest food you will find. Also, make sure to check out Judy Rodgers (Zuni Cafe) as she shares in her in site to this movement in her video. It's under the long list of restaurants below.
(I think I saw myself somewhere in the back of the kitchen in this video) ;)
Tuesday, September 18, 2007
SF Chronicle Article, Chef Liz Bills

This article is from the San Francisco Chronicle on February 21, 2007. If you want to check out the whole piece online, go here.
Liz Bills stirs a pot of her Nine-Hour Bolognese at Nopa restaurant in San Francisco. It's served over creamy polenta on Sundays. Chronicle photo by Craig Lee


Though the word "bolognese" also has become a generic term for meat sauce, it has a much stricter definition within Italy, where the quintessential ragu, or ragu alla bolognese, comes from Bologna and its surrounding region, Emilia-Romagna. But even there, recipes vary greatly. Most do not have much in the way of tomatoes -- usually only a little tomato paste or puree -- and include milk or cream.
Regional differences often come down to the availability of agricultural products. Northern Italy has more access to meat, while the less prosperous south relies more on vegetables. This partly explains why a Neapolitan ragu contains more tomatoes and less meat than a bolognese, says Chronicle contributor Joyce Goldstein, author of "Italian Slow and Savory" (Chronicle Books, 2004).
At Nopa restaurant in San Francisco, cook Liz Bills developed a recipe for Nine-Hour Bolognese as a way to use up high-quality scraps of meat, both cooked and raw. The restaurant serves the sauce over creamy polenta on Sundays.
"One day we may sell out of our beef entree, and the next day hardly sell any at all," she says. "So my solution to utilize most, if not all, of our meat products was to produce this dish and cut down on waste."
Lengthy process
Bills will use lamb, pork, beef and pancetta or all of the above in the sauce, and she recommends doing the same at home with whatever you have in the refrigerator, be it leftover pork chops or a little hamburger meat.
The reason the sauce takes so long to cook is that Bills first adds milk to the sauteed vegetables and meat, and allows it to evaporate very slowly, up to three hours. She then adds wine and repeats this lengthy evaporation process, before adding the tomatoes. At this point, she lowers the heat even more for an additional three hours of gentle simmering.
The grand total is more like 10 hours, if you include all the chopping and sauteing that goes on in the beginning. But home cooks making smaller batches will find it takes less time to evaporate the milk and wine than it does in Nopa's industrial-size pots.
Subscribe to:
Posts (Atom)